

From code to art to essays, generative AI is all the rage in the developer community. I personally try to get caught up in every new tech trend. The industry moves fast, and its sometimes overwhelming, so I prefer to get an overview of the trend so that I understand how it works, but I dont have to switch all my tooling every few months. However, GitHub Copilot and AI-generated art intrigue me so much. I can spend all day experimenting with tools like DALL-E and Hey, GitHub, a voice-activated AI pair programmer. I think generative AI shakes the core of our society. It may shift how we create art. It might transform how artists approach their creative process. Similarly, GitHub Copilot and other AI pair programmers evolved my development process. Its helped me think outside the box as a developer.
At GitHub Universe, April Leonard, Staff Engineering Manager for Codespaces, presented a few updates about GitHub Codspaces at GitHub Universe:
-
Codespaces is available for all GitHub Free and Pro plan users. GitHub Free users have up to** 60 hours per month of free Codespaces usage**. GitHub Pro users have up to 90 hours per month of free Codespaces usage.
-
Codespaces has templates. Templates include boilerplate code, forwarded ports, and a configured development container for some of the most common application frameworks like Next.js, React.js, Django, and Jupyter Notebook. Templates provide developers with a sandbox to build, test, and debug applications.
-
While Codespaces initially supported Visual Studio Code, Vim, and Emacs, it now provides support for other IDEs like IntelliJ, PyCharm, and JupyterLab.
-
GPUs for Codespaces are now in private preview, which means you can run machine-learning heavy tasks powered by your personal GPU in the cloud in GitHub Codespaces. April demonstrated how cool this was by generating a corgi in space with Stable Diffusion.
The demo was so awesome! Now, I had a mission: to learn how to generate AI art in Codespaces. Unfortunately, this is in private preview, so folks have to request access to do this. Luckily, I work at GitHub (hehe 😅🤪). I used GitHub Codespaces to generate the following images:


In this blog post, I will share the steps to generating AI art in GitHub Codespaces so that you can do it too.
What is GitHub Codespaces?
Lets start with the basics. If you havent used GitHub Codespaces before or youre not sure what it is, I can break it down for you. GitHub Codespaces allows you to code in your browser in an editor that resembles Visual Studio Code (or your favorite IDE). When you work in a codespace, the environment you are working in is created using a development container hosted on a virtual machine. GitHub Codespaces allows you to code in a container hosted in the cloud or an environment that doesn’t reside on your computer but rather on the internet. With GitHub Codespaces, developers can onboard to projects faster, code from anywhere, and standardize their development environments. Check out one of my past blog posts to learn more about GitHub Codespaces and containers.
What is GPU and when would you need GPU-Powered Codespaces
GPU is an acronym that stands for Graphics Processing Unit. While a CPU (Central Processing Unit) is the brain of the computer, the GPU processes graphics. All computing devices, such as iPads and laptops, need CPUs. GPUs were originally designed to display 3D graphics at a faster pace. Today, GPUs have evolved, and their ability to process data simultaneously and quickly makes them beneficial for gaming, video editing, bitcoin mining, and machine learning.
Sometimes, CPUs arent efficient for machine learning. If the task is data-intense, training your neural network may take longer. To solve this problem, engineers may purchase GPUs with a large amount of memory. We released GPU-powered Codespaces to make training and and developing in deep learning environments seamless for machine learning engineers.
What is Stable Diffusion?
Similar to DALL-E and MidJourney, Stable Diffusion is an open source machine-learning model that converts text into images. It learns the connection between image and text through a latent Diffusion Model process. Heres how the latent Diffusion Model process works:
-
AI receives an image
-
AI adds noise to the image until the image becomes completely unrecognizable. Noise is just another way of saying pixelated dots.
-
AI removes the noise until it produces a clear, high-quality image
-
AI learns from a database called LAION-Aesthetics. The database has image-text pairs so that it can learn to convert text into images.
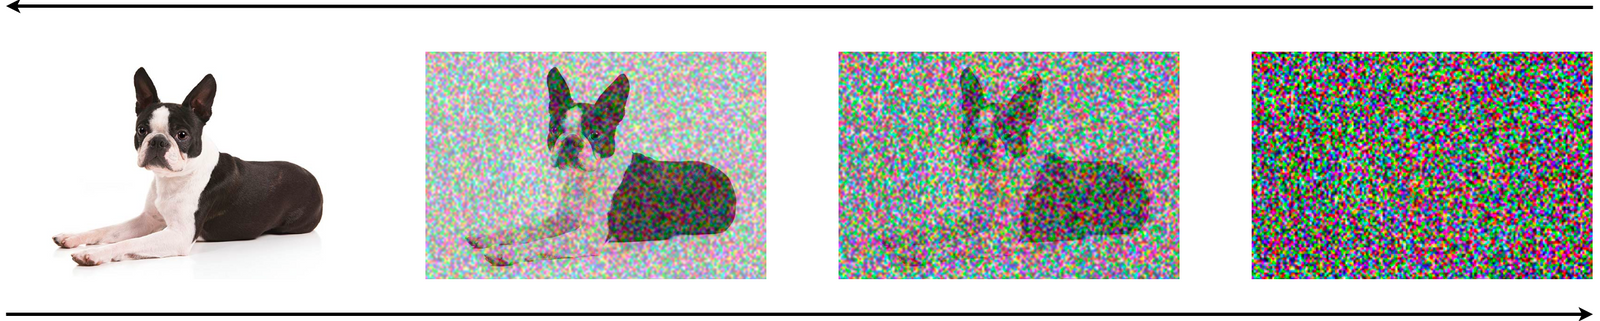
Credit: DagsHub
How to Generate AI Art in Codespaces
What you will need
-
GitHub account (free)
-
Hugging Face account (free)
-
GPU-Powered Codespaces (While Codespaces are available to everyone for free, GPU-powered Codespaces are currently in limited beta. To request access to the GPU machine type or any additional machine type, fill out this form. This option is ideal for folks who are executing data-heavy and complex machine learning workloads. You can learn more about the new offerings within GitHub Codespaces here.)
Step 1: Open a Jupyter Notebook template at github.com/codespaces/templates
This will open up a Codespace with a few Notebook files. We will use this environment to generate our AI art.

Step 2: Commit the files to a new repository
I did this step because I needed to make a few configurations to this environment on the repository level. For example, I need to add a GitHub Codespace secret, and I need to open this Codespace up in GPU. I started with this template because Im not a data scientist or machine learning engineer, and I dont use Jupyter Notebook regularly. Using this template allows me to not worry about how to set up a Jupyter Notebook.
Sidenote: Ive started using the Source Control GUI in Codespaces instead of the command line. At first, I was opposed to it because Im familiar with version control via the command, but the GUI is really convenient. If youre interested in using that path, check the image below:

In this image above, I click the source control button, I type a commit message, and then I press Publish Branch.
Step 3: Generate a Hugging Face API token at https://huggingface.co/settings/tokens
You may have to sign up for a Hugging Face account, which is completely free. Hugging Face is a community for folks who are interested in artificial intelligence, open source, and open science. Once you sign up and verify your account, you should be able to generate an API token at https://huggingface.co/settings/tokens
Step 4: Add your API token to your repositorys Codespace secrets store
I navigated to my repository titled codespaces-jupyter. This is the generic name given by the Codespace template. In the repository, I navigate to my Settings tab > Secrets and variables > Codespaces.
-
Your browser address should look something like: https://github.com/OWNER/REPO_NAME/settings/secrets/codespaces
-
In my case, it looks like: https://github.com/galaxy-bytes/codespaces-jupyter/settings/secrets/codespaces
In the Codespaces secrets store, I named my secret HUGGING_FACE_TOKEN and added the API token from Hugging Face as my secret.
Once saved, it should look like the image below:

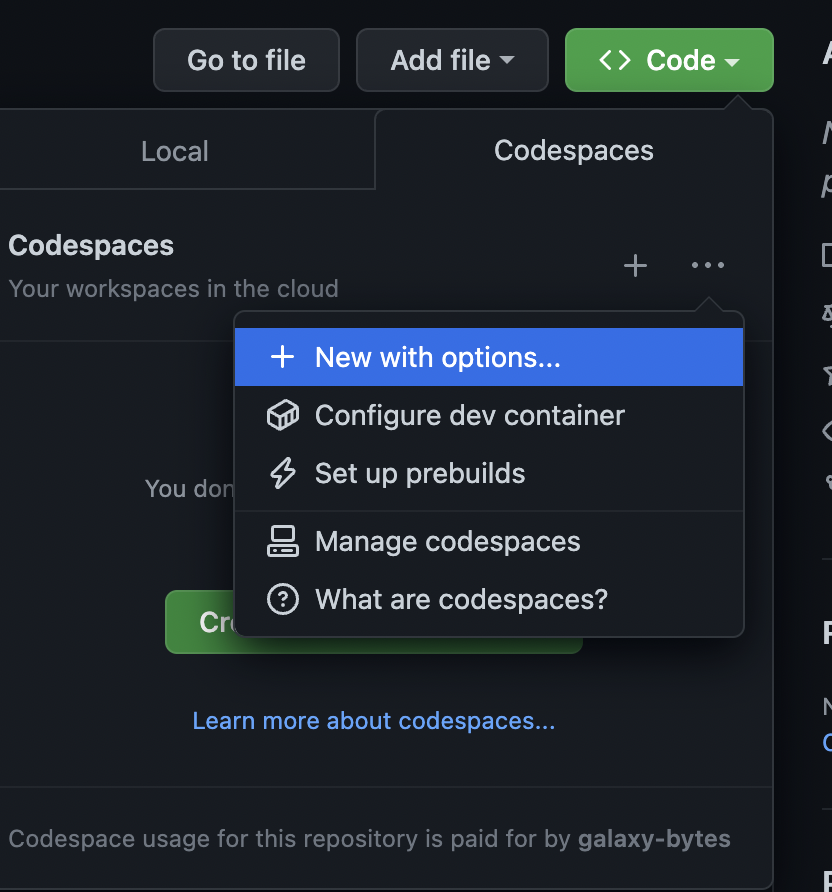
Step 5: Open your repository in a GPU-Powered Codespace
Click the Code button in your repository. You should see two options one for Local and another for Codespaces. Press the three dots under Codespaces to see the label New with Options. This allows you to choose the machine type.
Choose the machine type 6 core, 1 GPU. If you want to update the branch, region, and dev container configuration, you can, but I suggest using the defaults.

Step 6: In the notebooks folder, create a file called ai-generator.ipynb
You can name the file whatever you want, but it must end with the file extension .ipynb I also deleted the other files for my own sanity. However, you can leave those files if you want to experiment with them.
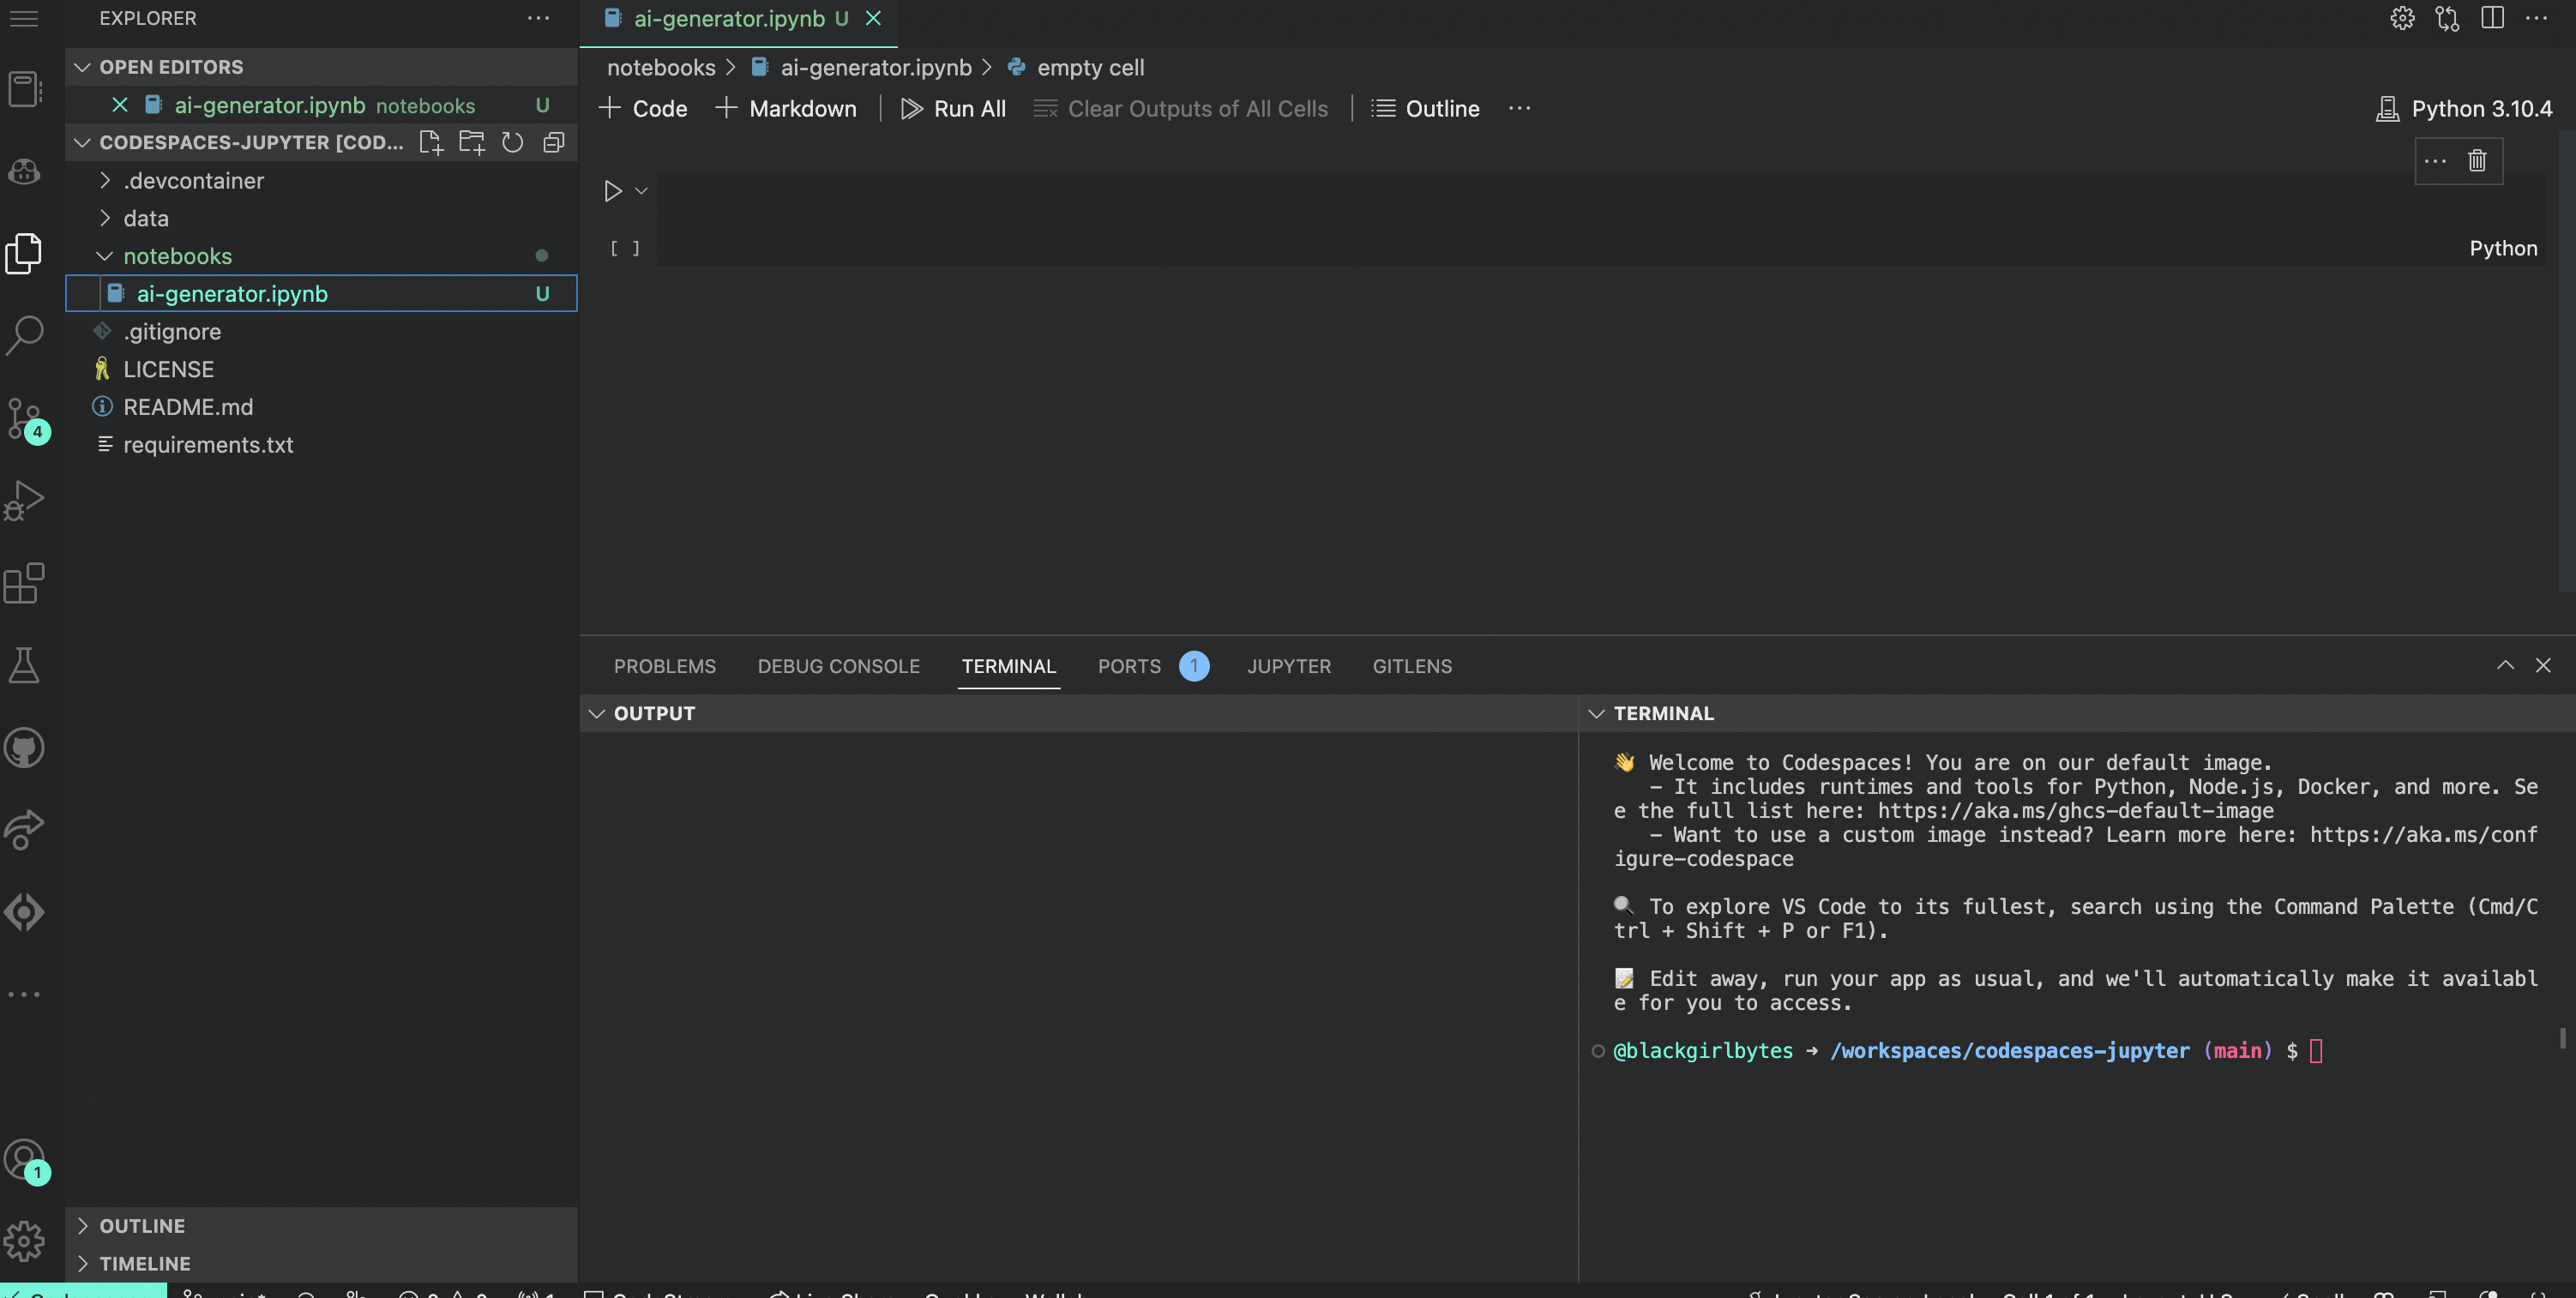
Step 7: Press the + Code button to add a cell in your notebook.
The cells are where you will add new lines of code!

Step 8: Install dependencies
You can do this by pressing adding the following lines of code to your cells in your notebook:
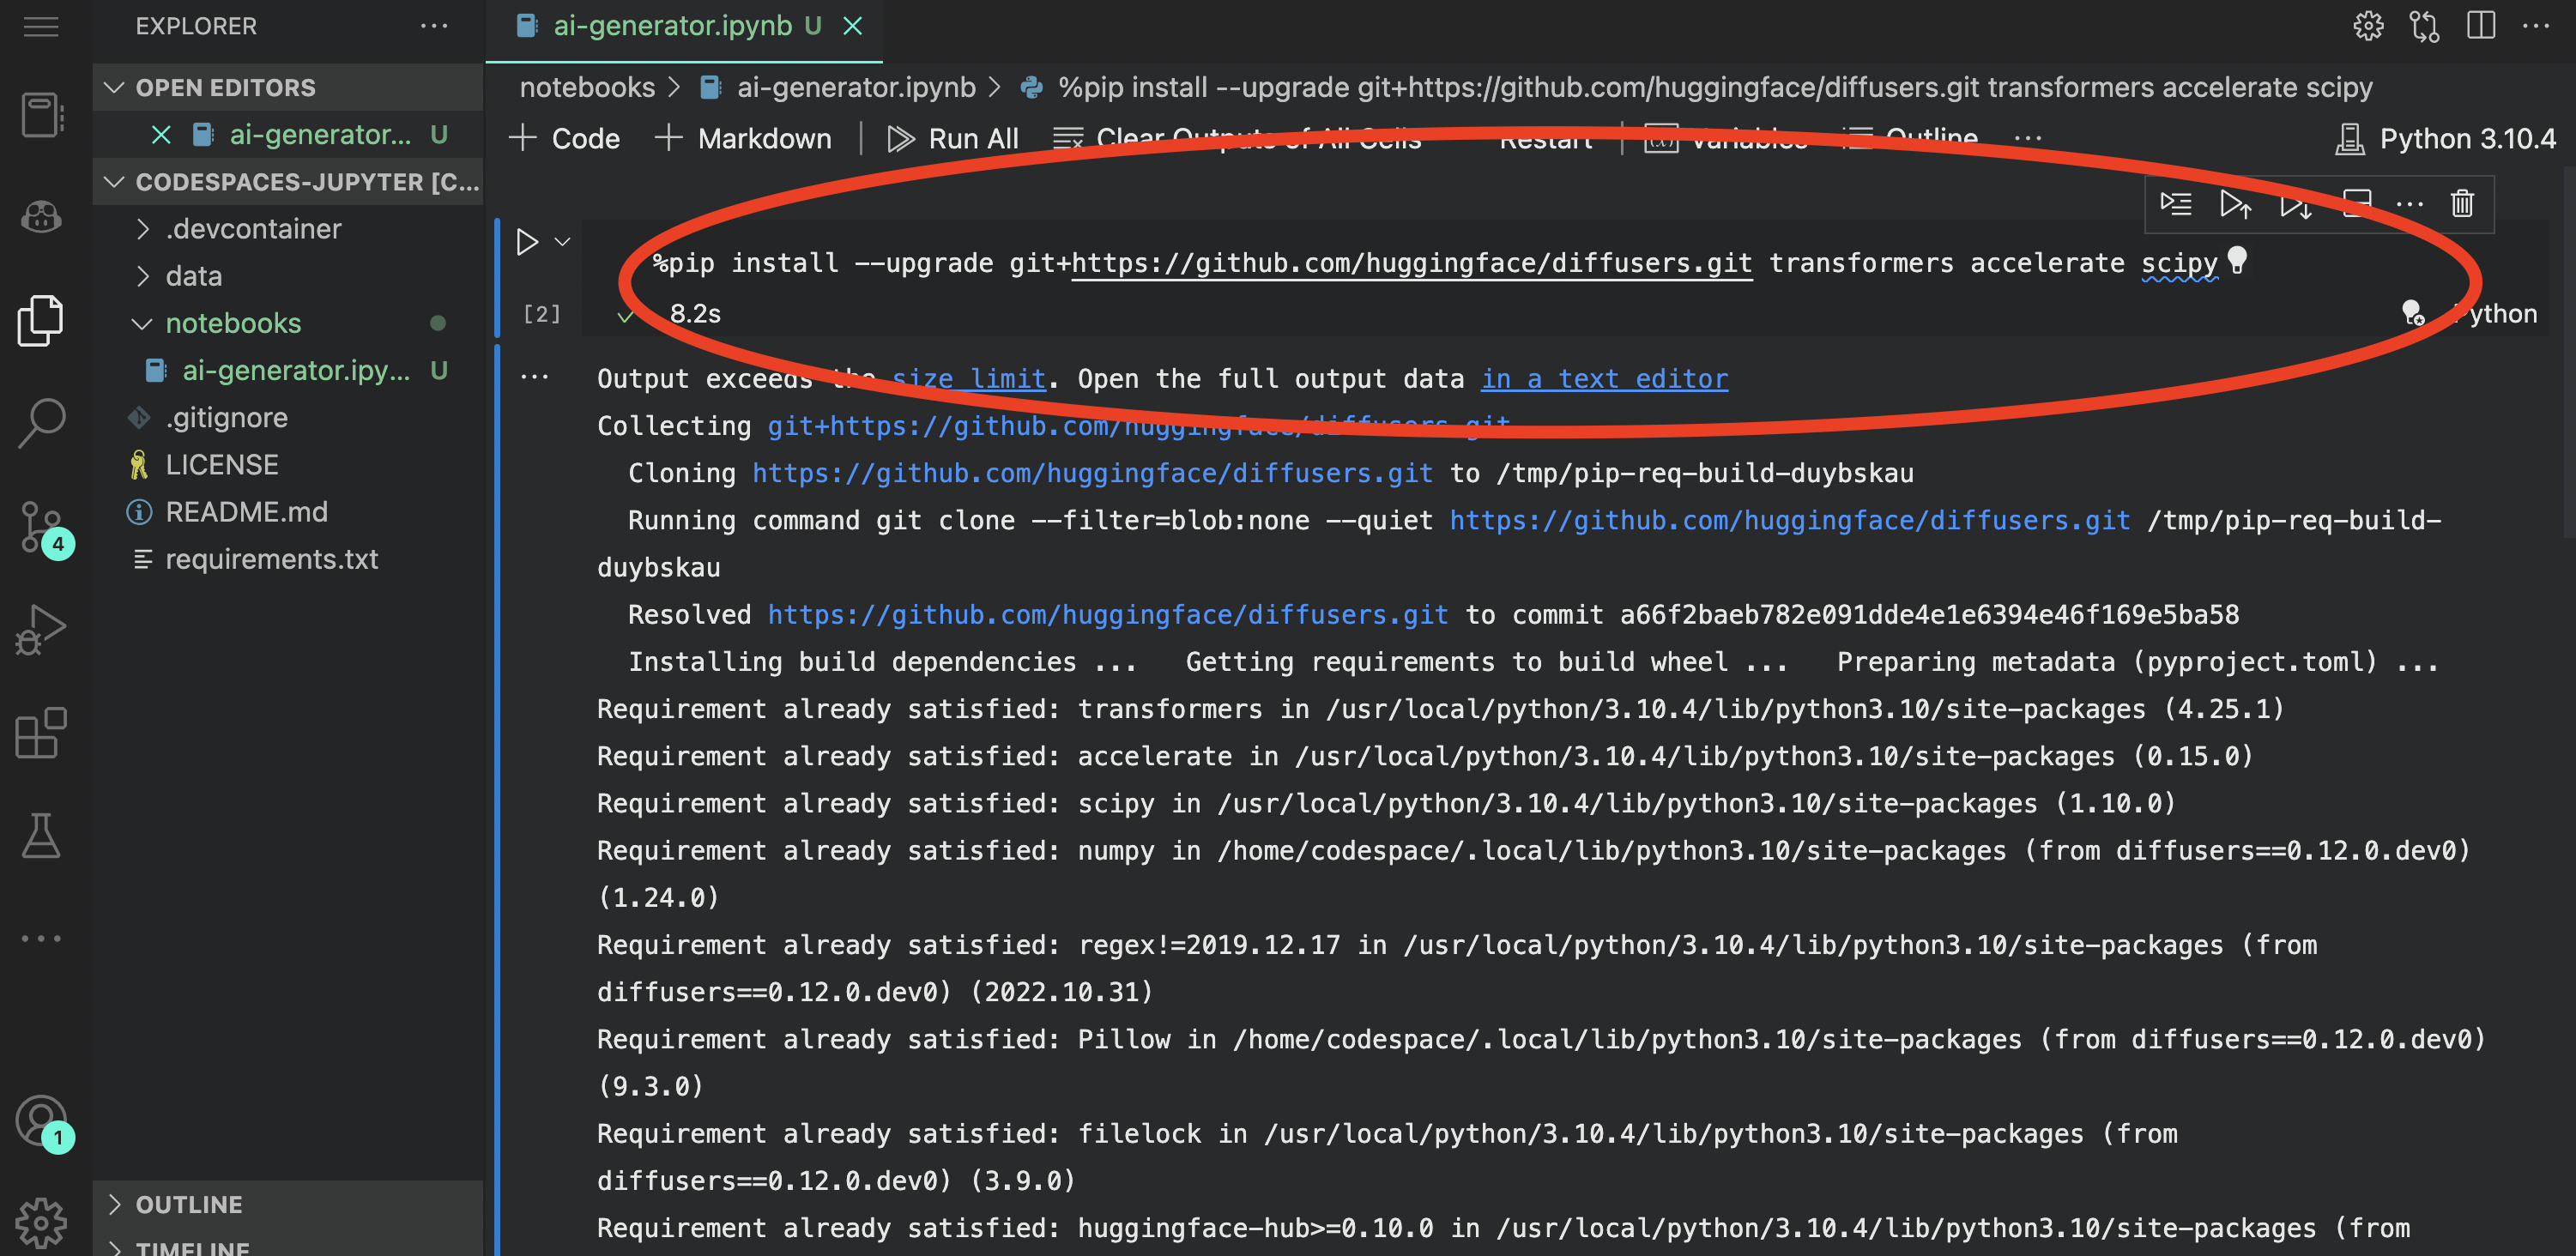
pip install --upgrade git+https://github.com/huggingface/diffusers.git transformers accelerate scipy
Press the play button to run that line of code. Once successful, it should render a checkmark.
The final results for this step should resemble the image below:
Step 9: Import dependencies and reference your HUGGING_FACE_TOKEN
In the next cell add these lines of code:
from huggingface_hub import HfFolder

from os import environ

token = environ.get("HUGGING_FACE_TOKEN")

HfFolder.save_token(token)
Press the Play button to run this line of code. If successful, you will see a checkmark. Take a look at the image below to verify your results:

Step 10: Dictate that you want to use the model in half-precision
Half-precision(fp16) will give sufficient performance and accuracy. Hugging face advises using this choice because it gives the same results as full precision while being roughly twice as fast and requiring half the amount of GPU RAM.
Add the following lines of code to your new cell:
import torch
from diffusers import StableDiffusionPipeline, EulerDiscreteScheduler

model_id = "stabilityai/stable-diffusion-2"

# Use the Euler scheduler here instead
scheduler = EulerDiscreteScheduler.from_pretrained(model_id, subfolder="scheduler")
pipe = StableDiffusionPipeline.from_pretrained(model_id, scheduler=scheduler, revision="fp16", torch_dtype=torch.float16)
device = "cuda"
pipe = pipe.to(device)
Once you press the play button, your results should resemble the image below:

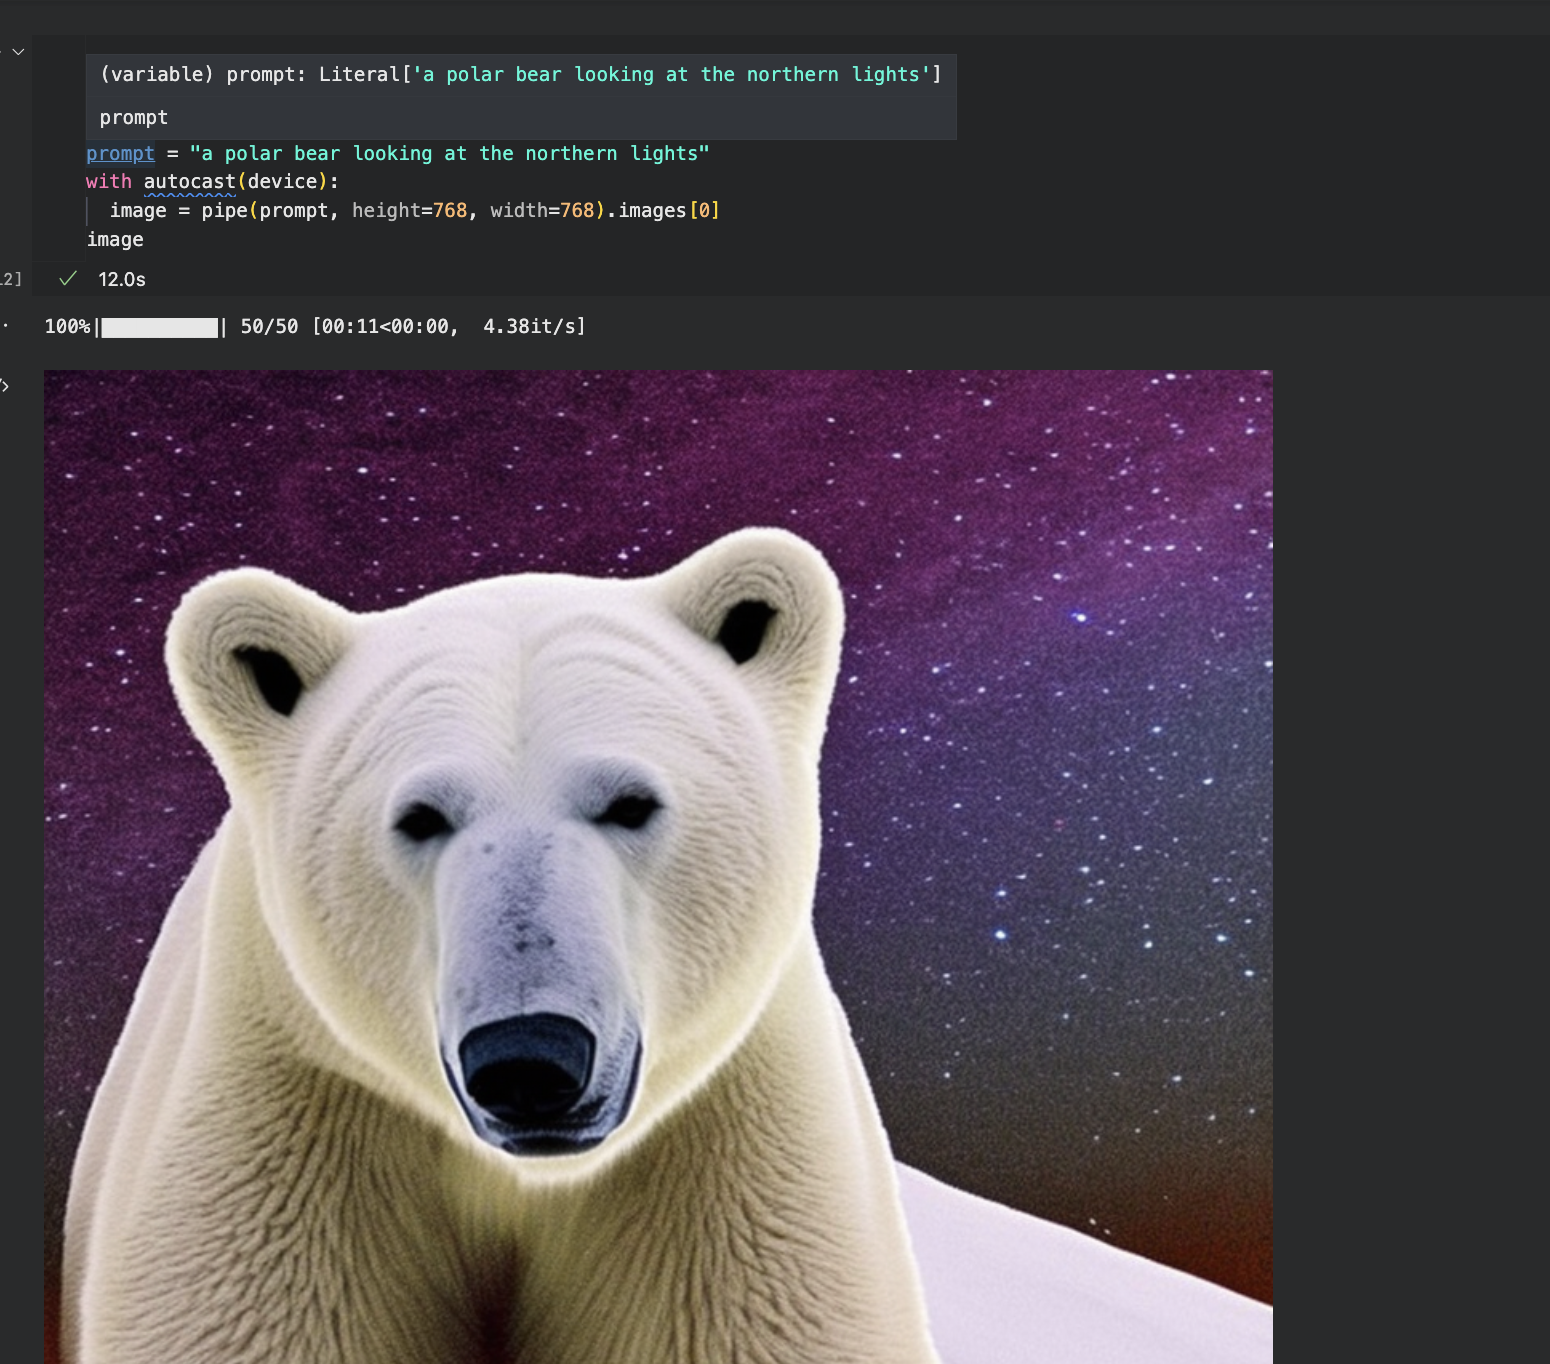
Step 11: Generate your art
The code below should generate art for you! Update the prompt to generate an image of your choice.
Of course, dont forget to run the code by pressing the Play button.
from torch import autocast

# Change prompt for image here!
prompt = "a cartoon black girl with cotton candy hair and a pink dress standing in front of a pink sky with cotton candy clouds"
with autocast(device):
  image = pipe(prompt, height=768, width=768).images[0]
image
See the image it generated for me below! So cute!

Sidenote: Toggling output
To toggle the output of each cell, press the letter o on your keyboard. I had a problem where I accidentally collapsed the output, and I wasnt sure how to reopen it.
Step 12: Commit your changes to the repo and share your results below!
I would love to know what you created, so feel free to share it with the community.
Fork my repo!
You can find my repository here: https://github.com/galaxy-bytes/codespaces-jupyter
You can find my GitHub account here: https://github.com/blackgirlbytes, but I use the other account above for Codespaces demos.
Feel free to fork my repo and open it in a Codespace to generate your own AI art.
Comment below to let me know your thoughts! Follow GitHub and me for more content on DEV!